This tutorial shows how to remove the Chain Ring Assembly from the XE-1
1. Work Instruction – Remove Chain Ring
TOOLS REQUIRED
| ID | Description | Task |
| JP00060 | TOOL, LOCKING RING, ISIS, WITH CORE, STD | Remove Chain Ring Spider Lock Nut (Ring) |
| 19 mm Ring or Open-Ended Wrench | Remove Chain Ring Spider Lock Nut (Ring) |
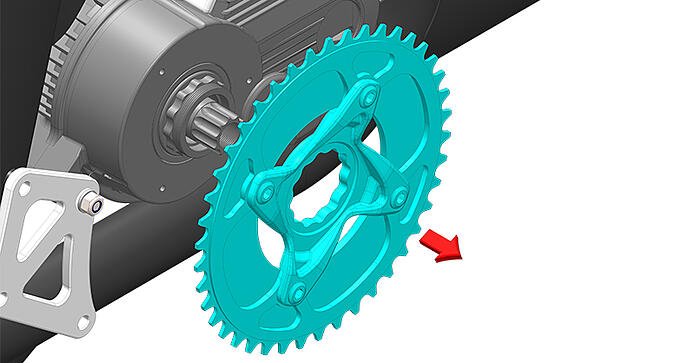
1.1 Loosen and remove the Lock Nut by rotating the round nut clockwise with the Locking Ring tool.

|
|
INFORMATION: Screw the tool core into the axle, place the main tool body with pins over the core and to engage the 8 Lock Nut holes. Using a 19 mm wrench, rotate the tool and nut clockwise to remove the lock nut. Use the Left-Hand Crank Arm on the opposite side to stop the Motor shaft from rotating when loosening the Lock Nut. |

1.2 Remove the Chain Ring Assembly by pulling off the Motor Drive Shaft Spline.